February 27, 2010

Grunge Style

So what does the dictionary describe as grunge? Well believe it or not, I couldn't find it in my old dictionary and had to look it up on the Internet. Def: a style or fashion derived from a movement in rock music: in fashion characterized by unkempt clothing and in music by aggressive, nihilistic songs.

Grunge in artwork gives it that messy, roughed up look, with different images coming together to create a trashy but classy layout.My DD took this rather creative image of herself after plastering her kohl pencil around her eyes, much like a giant panda, but the photo of her is just beautiful in my eyes. So hard to believe that she was still twelve when this photo was taken.

So many elements on this layout but they all come together to create the one theme. The photo was modified to sepia and printed on glossy paper. I roughed up the edges a little with some sandpaper. The background paper was inked for further grunge effect, then crumpled and flattened slightly before adhering to my card stock.

The chipboard elements ie clock and love word were also inked before attaching to the layout. A length of string was wound through and over the clock and secured at the top of the page. I searched through my stash to find some grungy looking flowers and adhered these in various positions on the page.


Even glittered 3D butterflies don't look out of place on this layout as do the metal embellishments in the centre of the clock.


I hesitated to add this label but with a bit of inking and roughing up, it also suited the theme.

All said and done my layouts are evolving as my daughter's tastes transform from my girl to the young lady she's becoming. Don't forget to capture your children's styles as much as this may not be in your comfort zone, your children will appreciate you effort to show them as they are.


February 15, 2010

Competition Prizes


Hi everyone, my order arrived today so now I can share with you the prizes Scrappit has on offer for our competition. 1st Prize is a co-ordinating Tote with a large shoulder bag, second prize is a work in progress 12 x 12 folder. The competition has only just started this month and you have plenty of time to get your entries in - just Scrap a page of your day to day routine each month send the file to Scrappit we will load it up on the blog. The winner is chosen randomly - no set criteria apart from your day to day routine on a page. Monthly prizes are a $20.00 gift voucher at Scrappit, each monthly winner will go into the draw for the Tote and Shoulder bag and the Work In Progress folder. That equals a one in six odds for a win. so get busy with your creative juices and e-mail the finished page to sales@scrappit.com.au

February 3, 2010

Card Class - Scrap Day 6th Feb


Card Class for Saturday - Make these stunning cards during the day. We are open 9.00am - 5.00pm Sat 6th Feb. Where. Wyndhamvale Christian Centre, 433-438 Ballan Road Wyndhamvale. Contact Jan 0400 364 320

February 2, 2010

Scrappit's NEW Competition for 2010

Our first competition for the year - and its going to be fantastic. Do you scrap your every day details? well we want you to Scrap a day a month for 6 months. Any topic, any size, any colour - whatever you wish to create. Each month we will give away a $20.00 to a randomly selected winner - that's right it doesn't have to fit into any criteria except it must be part of your day to day routine. At the end of 6 months those 6 lucky monthly winners will be put into a draw for a fantastic prize (TBA). Are you keen - for a chance to win a $20.00 shopping voucher with Scrappit all you need to do is send your entry by the end of each month to sales@scrappit.com.au we will publish it for you on our blog. Winners notified by e-mail,

February 1, 2010

Scrap Day Feb 6th 2010


One of the classes available on Saturday, don't forget we have card classes too. Lotsof variety and the Scrappit shop is there for you to browse through any time of the day. For bookings call 0400 364 320 or e-mail sales@scrappit.com.au.

Stamping on Cardstock

If you're like me and have more stamps than you can poke a stick at and they just seem to be gathering dust, give this little project a go.

I've selected a few of my flower stamps and using black dye ink, I've stamped my flower on different coloured cardstock. Trim around the edges and attach these to your layout. If you stamp on a separate piece of cardstock the same colour as your background you can give the impression you have stamped these directly on to your layout. This is a great way of giving the look without the worry of 'messy up your background if it goes wrong'.


I have also stamped the Imagine stamp on a separate piece of cardstock the same as my background and trimmed and added to my layout.


A small amount of yellow chalk is all that is need to highlight the pale flowers to give the extra zing you need. Raise a few of the images with pop dots to create a sense of dimension.


Rubon flourishes and words complete the look without a single piece of patterned paper used.

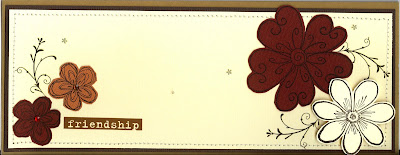
Here are a sample of cards you can create by following the same principle as the layout above.


So before you reach for the patterned paper again, think of your stamps and what you can do with a little imagination.